Shifting Gears on Your Bicycle: A Beginner's Guide

Gearing Basics:
Drivetrain Breakdown:
Let's break down the key components of your bicycle's drivetrain:
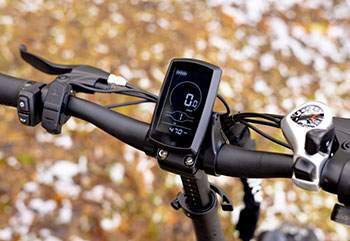
- Shifters: These levers on your handlebars control the derailleurs, which help you change gears on your geared bicycle. The left shifter controls the front derailleur, which moves the chain between the front gears, and the right shifter controls the rear derailleur, which shifts the chain between the rear gears.
- Derailleurs: These mechanical marvels move the chain between different chainrings and cassette sprockets to change gear ratios. The front derailleur shifts the chain between the chainrings, while the rear derailleur shifts the chain across the cassette.
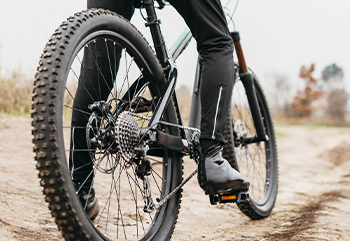
- Cassette: This is the cluster of gears on your rear wheel. It has multiple sprockets with varying numbers of teeth.
- Chainrings: These are the chain-grabbing gears located on your crankset. They typically come in two or three sizes.
Gear Ratio Explained:
The gear ratio is the relationship between the number of teeth on your chainring and the number of teeth on your cassette sprocket. Here's the key:
- More teeth = harder gear (higher gear ratio): This allows you to pedal faster but with more effort, ideal for flat terrain or downhill riding.
- Fewer teeth = easier gear (lower gear ratio): This allows you to pedal slower but with less effort, perfect for climbing hills.

Using Your Shifters:
Left vs. Right Shifter:
- The left shifter Controls the front derailleur, which moves the chain between the different sized chainrings. It typically has two levers: * Larger lever (usually towards the handlebar): Upshifts the chain to a larger chainring (harder gear) for faster pedaling on flats or downhills. * Smaller lever (usually away from the handlebar): Downshifts the chain to a smaller chainring (easier gear) for better climbing power.
Right Shifter:
- Controls the rear derailleur, which shifts the chain across the cassette with varying sized sprockets. It also typically has two levers:
- Larger lever (usually towards the handlebar): Upshifts the chain to a smaller cassette sprocket (harder gear) for faster pedaling on flats or downhills.
- Smaller lever (usually away from the handlebar): Downshifts the chain to a larger cassette sprocket (easier gear) for increased climbing efficiency.
Shifting Technique:
For smooth and efficient gear changes, remember these tips:
- Reduce pressure on pedals momentarily: As you shift, slightly ease off your pedaling pressure for a split second. This allows the derailleurs to move the chain more easily and prevents grinding noises.
- Shift one gear at a time: When making significant gear changes, especially while climbing, shift one gear at a time to avoid putting too much strain on the drivetrain.
- Anticipate terrain changes: Don't wait until you're in the thick of a climb to shift. Try to anticipate upcoming hills or changes in terrain and shift gears beforehand for a smoother transition.

Shifting for Different Conditions:
Climbing:
Climbing is where your gears become your greatest allies. Here's how to tackle those hills efficiently:
- Downshift your front derailleur: Use the smaller lever on your left shifter to move the chain to the smaller chainring. This provides a wider range of easier gears for climbing.
- Use the rear derailleur for fine-tuning: Once in the low gear range of the front derailleur, use the right shifter to find a comfortable gear on the cassette. You want a gear that allows you to maintain a steady cadence without excessive strain.
Normal Riding:
On flat terrain, you'll likely spend most of your time in the middle gear range of both shifters. This provides a good balance between pedaling power and speed.
Downhill:
When descending, you want to be in a gear that allows you to maintain control while still being able to brake effectively. Here's what to do:
- Upshift your front derailleur: Use the larger lever on your left shifter to move the chain to the larger chainring. This provides a range of harder gears for faster pedaling.
- Use the rear derailleur for fine-tuning: Similar to climbing, use the right shifter to find a comfortable gear on the cassette that allows you to control your speed while braking as needed.

Avoiding Cross-Chaining:
What is Cross-Chaining?
- Cross-chaining occurs when you're using the largest chainring with the smallest cassette sprocket, or vice versa, in all about gear. This creates an extreme diagonal angle for the chain across the drivetrain
Why Avoid Cross-Chaining?
Cross-chaining is inefficient and can cause several problems:
- Increased drivetrain wear: The chain runs at an unnatural angle, putting excessive stress on the chain, cassette, and chainrings, leading to premature wear.
- Reduced pedaling efficiency: The chain becomes more binding due to the angled position, resulting in wasted energy and a less smooth pedaling experience."
How to Avoid Cross-Chaining:
Being mindful of your gear selection is key to avoiding cross-chaining. As you shift, anticipate your next gear change and try to keep the chain at a relatively straight line between the chainring and cassette sprocket.
Conclusion:
Key Takeaways:
- Gears are essential for conquering hills, maintaining speed, and controlling your descents.
- Use the left shifter for the front derailleur (easier/harder gears for climbing/flat terrain) and the right shifter for the rear derailleur (fine-tuning gear ratio).
- Shift smoothly by momentarily reducing pressure on pedals and anticipate terrain changes.
- Choose appropriate gears for climbing (low gear range), normal riding (mid-range), and downhill (high gear range).
- Avoid cross-chaining to maximize drivetrain efficiency and lifespan.

Practice Makes Perfect:
Now that you understand the basics of shifting gears, it's time to put your knowledge into practice! Find a safe, open area and experiment with shifting through your gears while riding. Here are some additional tips:
- Start on flat terrain and get comfortable shifting between the different gear combinations on your shifters.
- Once comfortable, try practicing upshifts and downshifts while pedaling at a steady cadence.
- Gradually progress to practicing gear changes on gentle inclines and declines to simulate real-world riding scenarios.
With a little practice, shifting gears will become second nature, allowing you to tackle any terrain with confidence and efficiency.
Bonus Tip: Maintenance Matters!
To keep your gears shifting smoothly and efficiently, remember the importance of regular geared bicycle maintenance. Here are some quick tips:
- Keep your drivetrain clean by wiping away dirt and debris from the chain, cassette, and chainrings after every ride.
- Lubricate your chain regularly with a dedicated bicycle chain lube to reduce friction and wear.
- Consider having your bicycle professionally serviced periodically for a thorough cleaning and adjustment of your drivetrain components.
By following these tips and practicing good shifting techniques, you'll be well on your way to becoming a master of your bicycle's gears and a more confident cyclist overall!
Related Blogs

Geared Bicycles
Shift Like a Pro: Mastering Your Bike's GearsLearn how to use your bicycle's gears effortlessly with this simple guide. Master shifting for hills, flats, and descents with clear visuals and easy-to-follow tips.

Cycling Adventures
Top 10 Cycling Events in India You Should Know AboutCycling has become an obsession in India, rather than just a mode of transportation. Cycling events have taken center stage in the country, since there is an increasing emphasis on fitness, adventure, and environmental awareness.

Electric Bicycle
A Novice's Guide To E-Bikes: Everything You Need To Know About Electric BicyclesElectric bicycles are creating waves amongst bicycle enthusiasts, but what is it that everyone is loving about them and why should you know all about them? Read here to know more.

